Understanding Light Distribution Patterns for Effective Outdoor Lighting
Contents
When talking about lighting, one thing that seems to get forgotten a lot is the fixture’s distribution pattern. Every fixture, even globe lights, has a distribution pattern. The distribution pattern is how the light moves from the fixture out to the area around it, typically on the ground. This is called the lighting footprint, and it provides a specific pattern on the ground and varies from one type to the next.
How Distribution Patterns Work
The larger the distribution pattern, the larger area of light that is produced. The higher up the fixture is mounted, the larger that area of light becomes. If you have a fixture mounted at 10’ above grade, the pattern will cover a much smaller area than if you take the same fixture and wattage and mounted it higher up, say at 20’. The fixture can cover a much larger area; however, the foot-candle on the ground will be reduced.
This is why it is important to understand the differences between wattage and lumens. A fixture's lumen output determines its amount of light, not its wattage. Therefore, the same wattage fixture from different manufacturers can have very different light levels.
This is also true of distribution patterns. A Type 4 distribution pattern from one manufacturer can be very different from another. It depends on the optics being used and how the manufacturer wants the light to move; however, they are all very similar. Some fixtures are now offering backlight control without the need for ugly shields, which was required on old-style fixtures.
Let’s go over the various distribution types and what each is used for, and why.
Type 2 Distribution
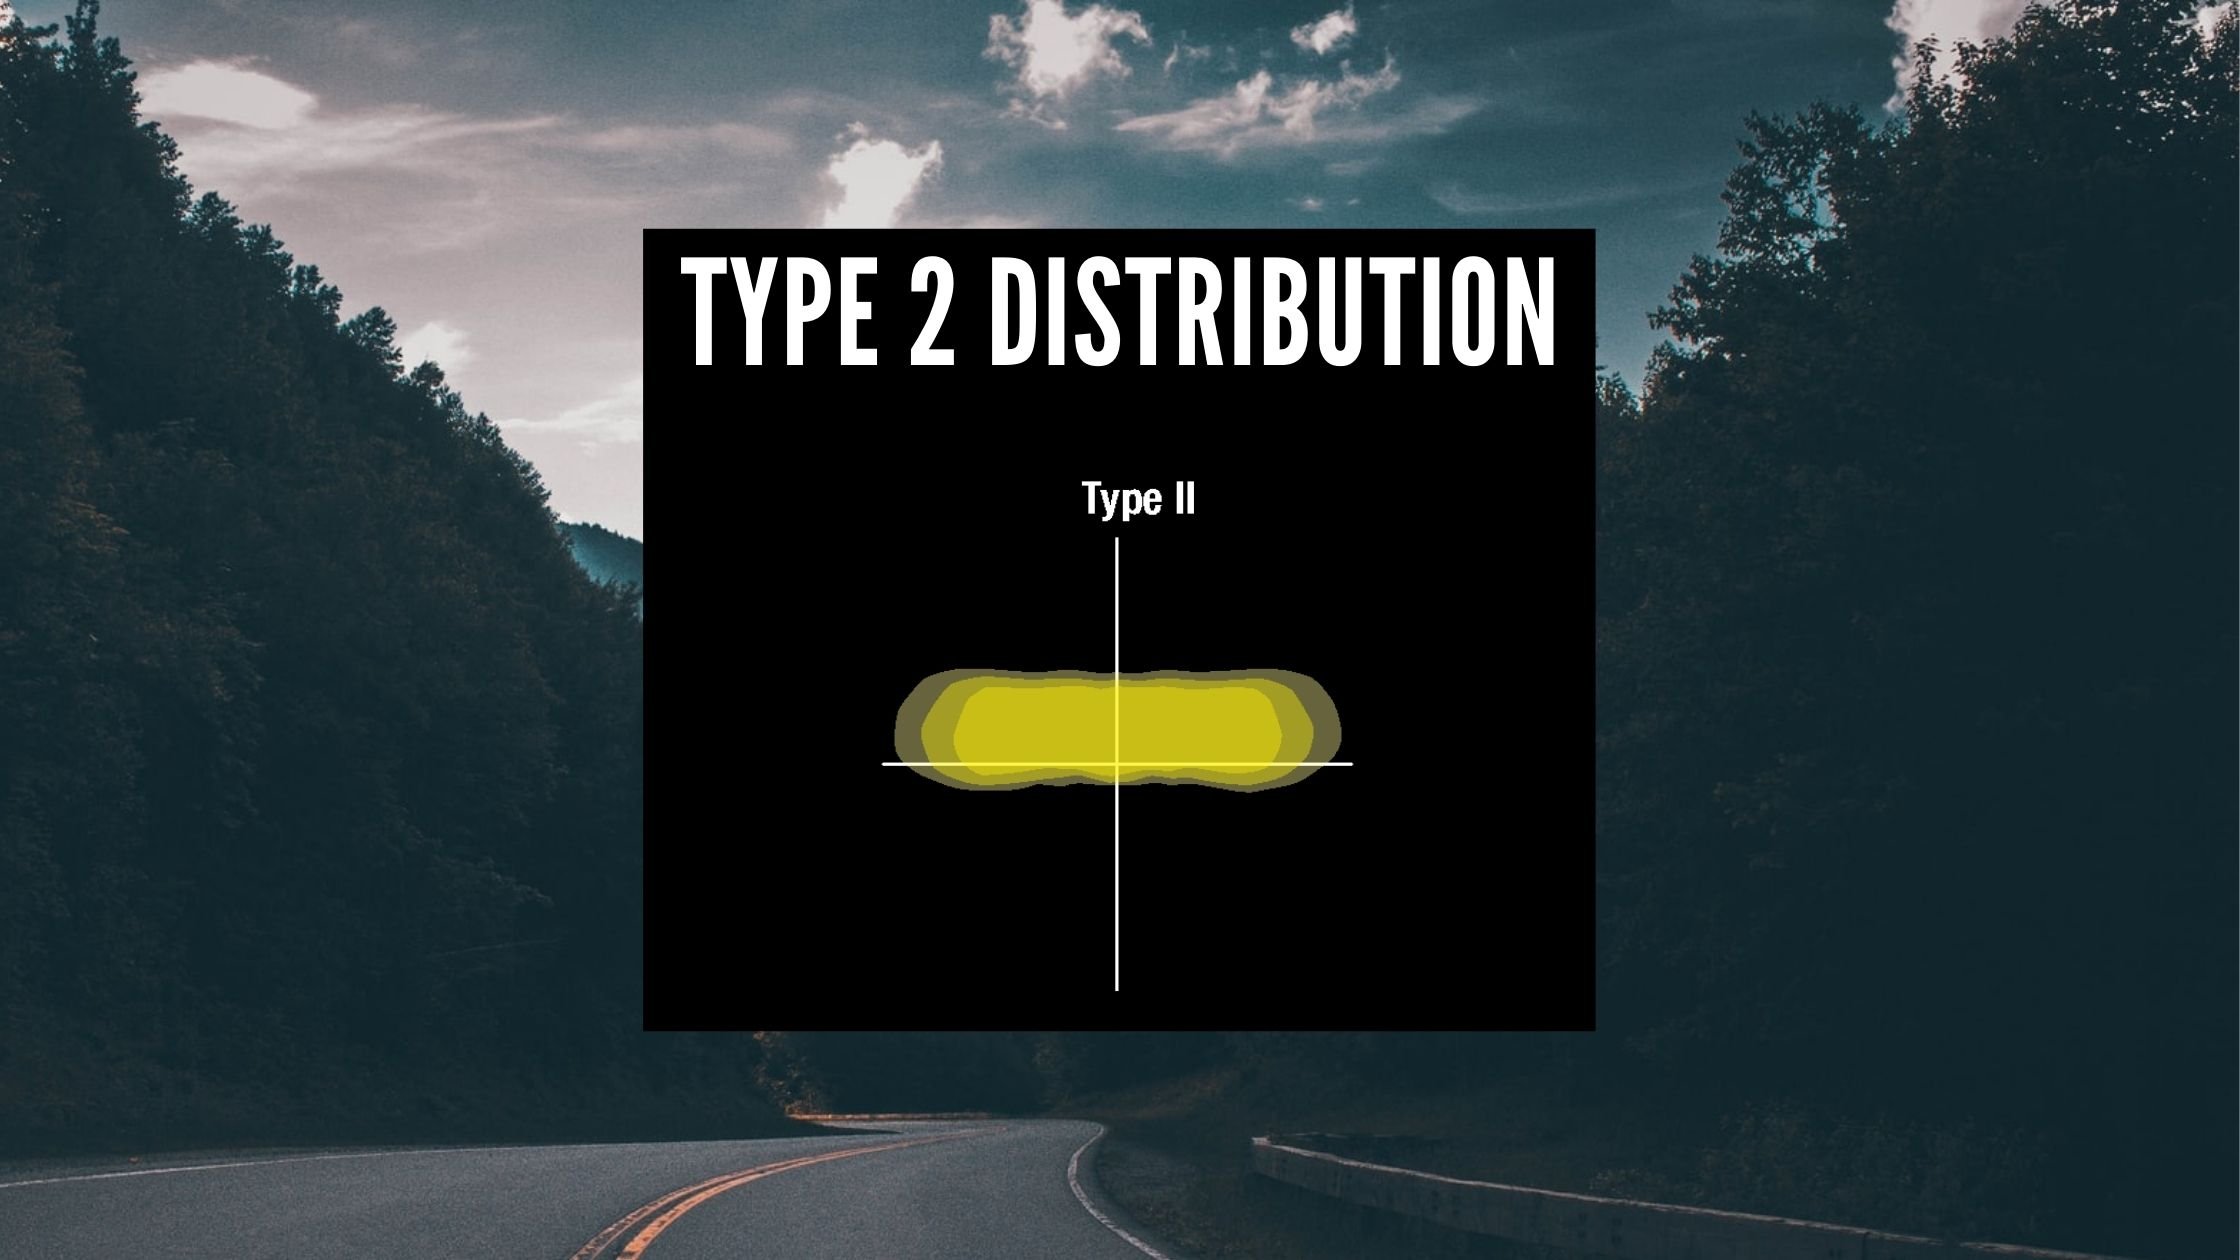
Type 2 distribution patterns are long linear patterns perfect for streets, roadways, narrow parking lots, pathways, and sidewalks. These fixtures provide the most light around 20’ in front of the fixture head and around 30-50’ from the center out each side, depending on the mounting height of the fixture.
Using a Type 2 fixture, you would install the fixture head in the center of the area where the light is required. The light would mostly be distributed out from the sides of the fixture with only a little forward throw. This allows the light to follow along a pathway without wasting light in areas that wouldn’t be needed, along with a linear setup.
Type 3 Distribution
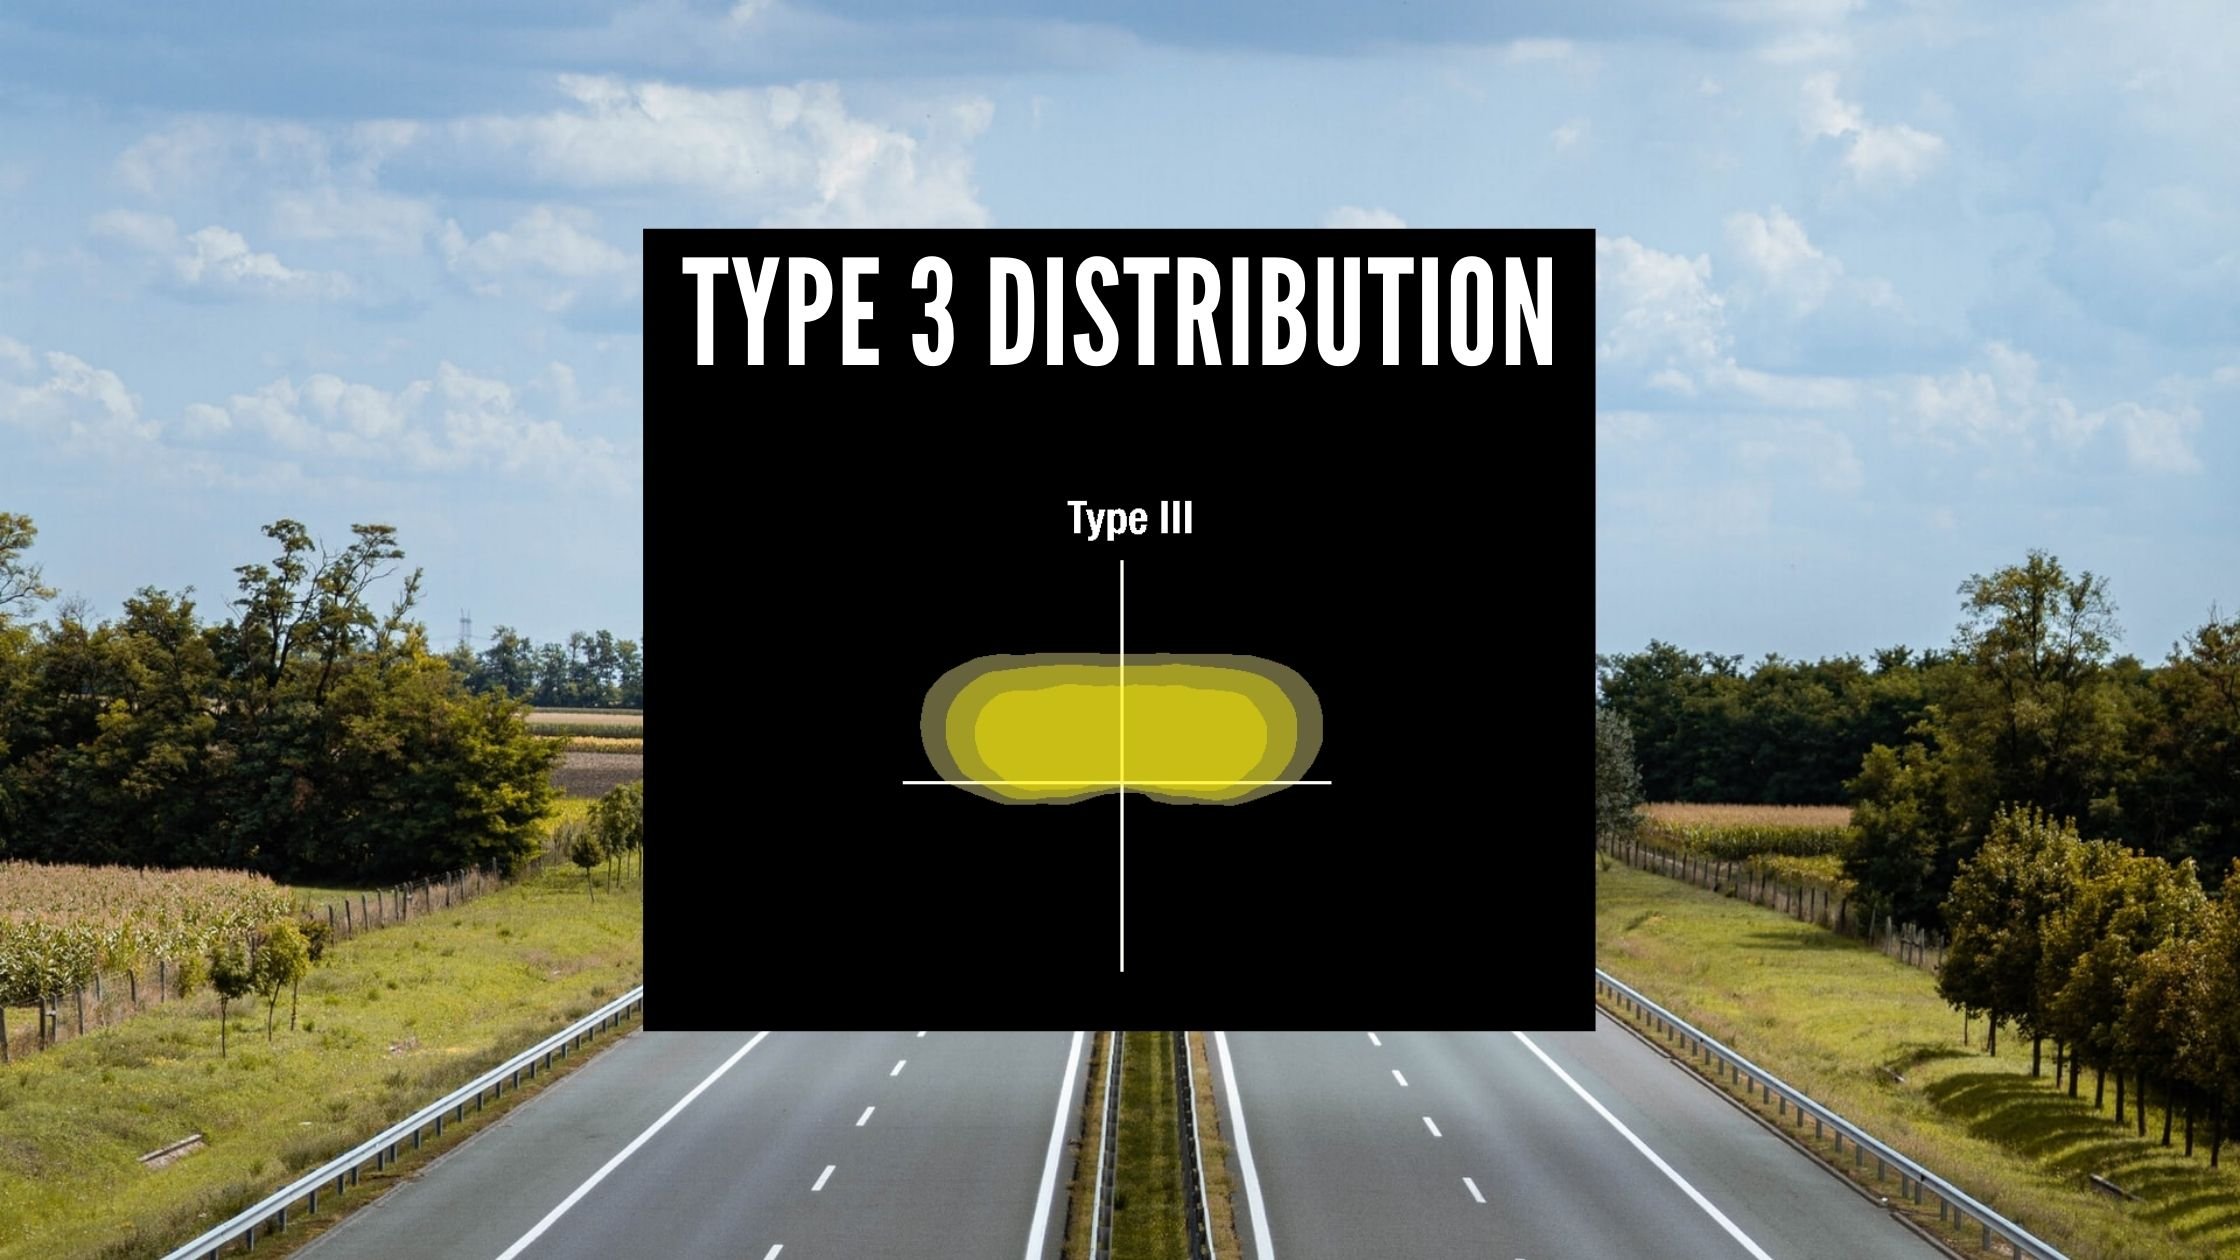
Type 3 distribution patterns are similar to a type 2 distribution pattern, but they pull in a bit from the sides and then push forward more. These are perfect for small parking lots, wider roadways, or area lighting. These fixtures provide about 30’ of light in front of the fixture head and around 25-40’ from the center out each side, depending on the mounting height of the fixture.
Type 3 fixtures are also great for staggering from one side of an area to the other or face-to-face since the forward push is greater than that of a Type 2 fixture. There is also more backlight than in a Type 2 fixture, so illuminating a small area behind the fixture is also possible.
Type 4 Distribution
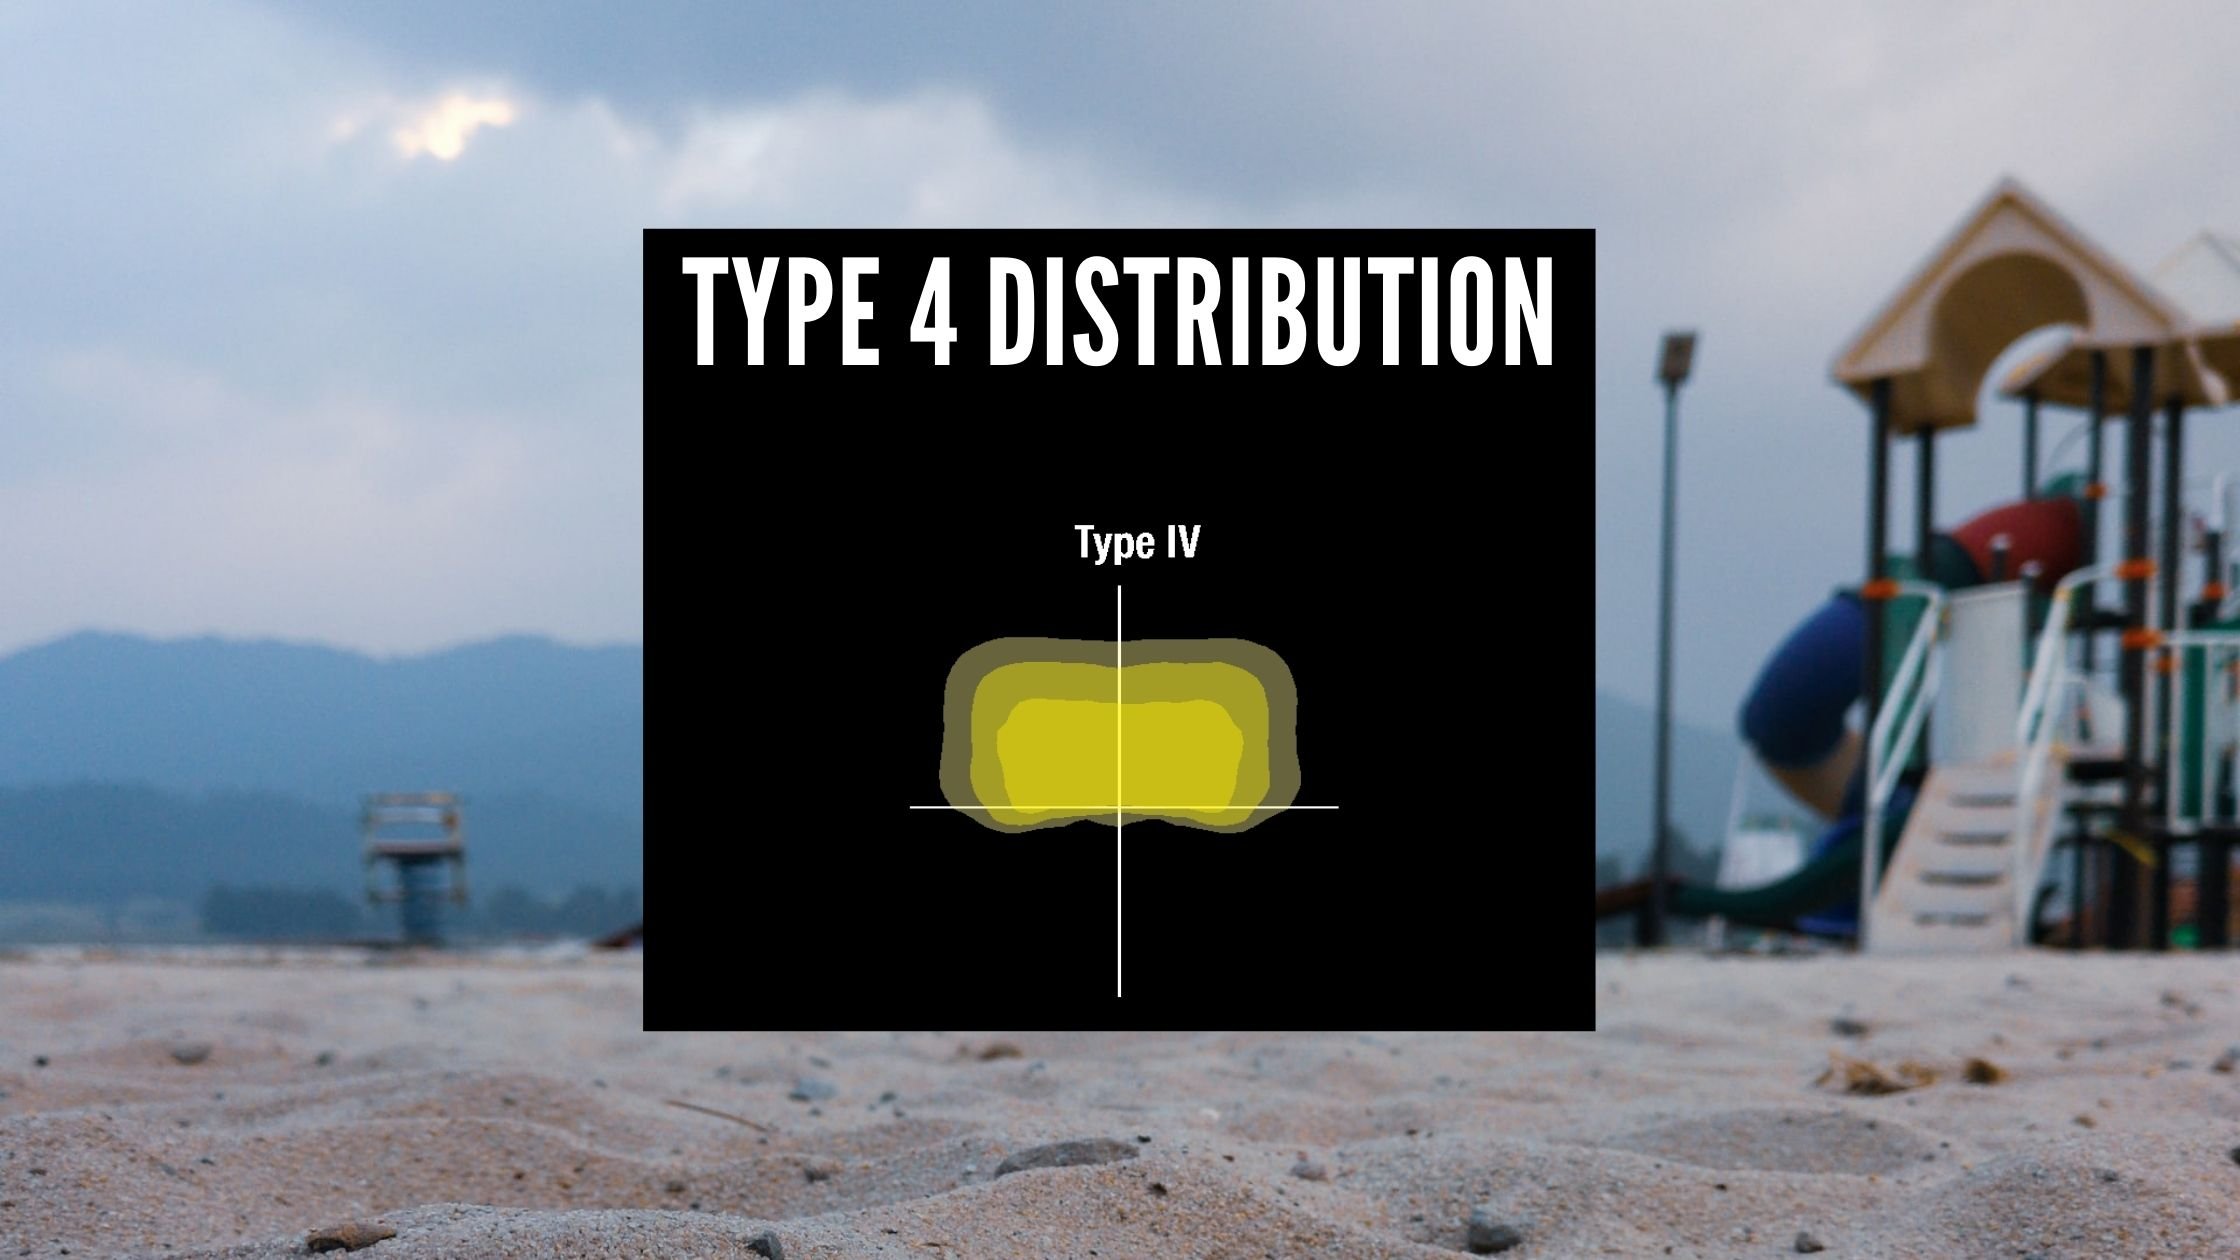
Type 4 distribution patterns are more of a round forward push distribution of light. The amount of light that is pushed forward is similar to the side-to-side push with little backlight. These are good for parking lots and large area lightings, such as playgrounds and park areas.
A Type 4W distribution has more of a side-to-side push of the light and almost no backlight. This is especially good for applications where the light cannot be pushed behind the fixture and needs to be pushed further from side to side.
Type 5 Distribution
.jpg?width=2240&name=Blog%20Banner%20(2).jpg)
Type 5 distributions provide the largest, most even pattern of light in all directions. The light is pushed in all directions from the light fixture and is used for large parking areas, or anywhere a large even pattern of light is required.
Type 5 distributions are also used for pavilions, restrooms, and other overhead lighting needs, typically with canopy-style fixtures. These fixtures provide a large area of light and can be used in various applications.
Spot Lights
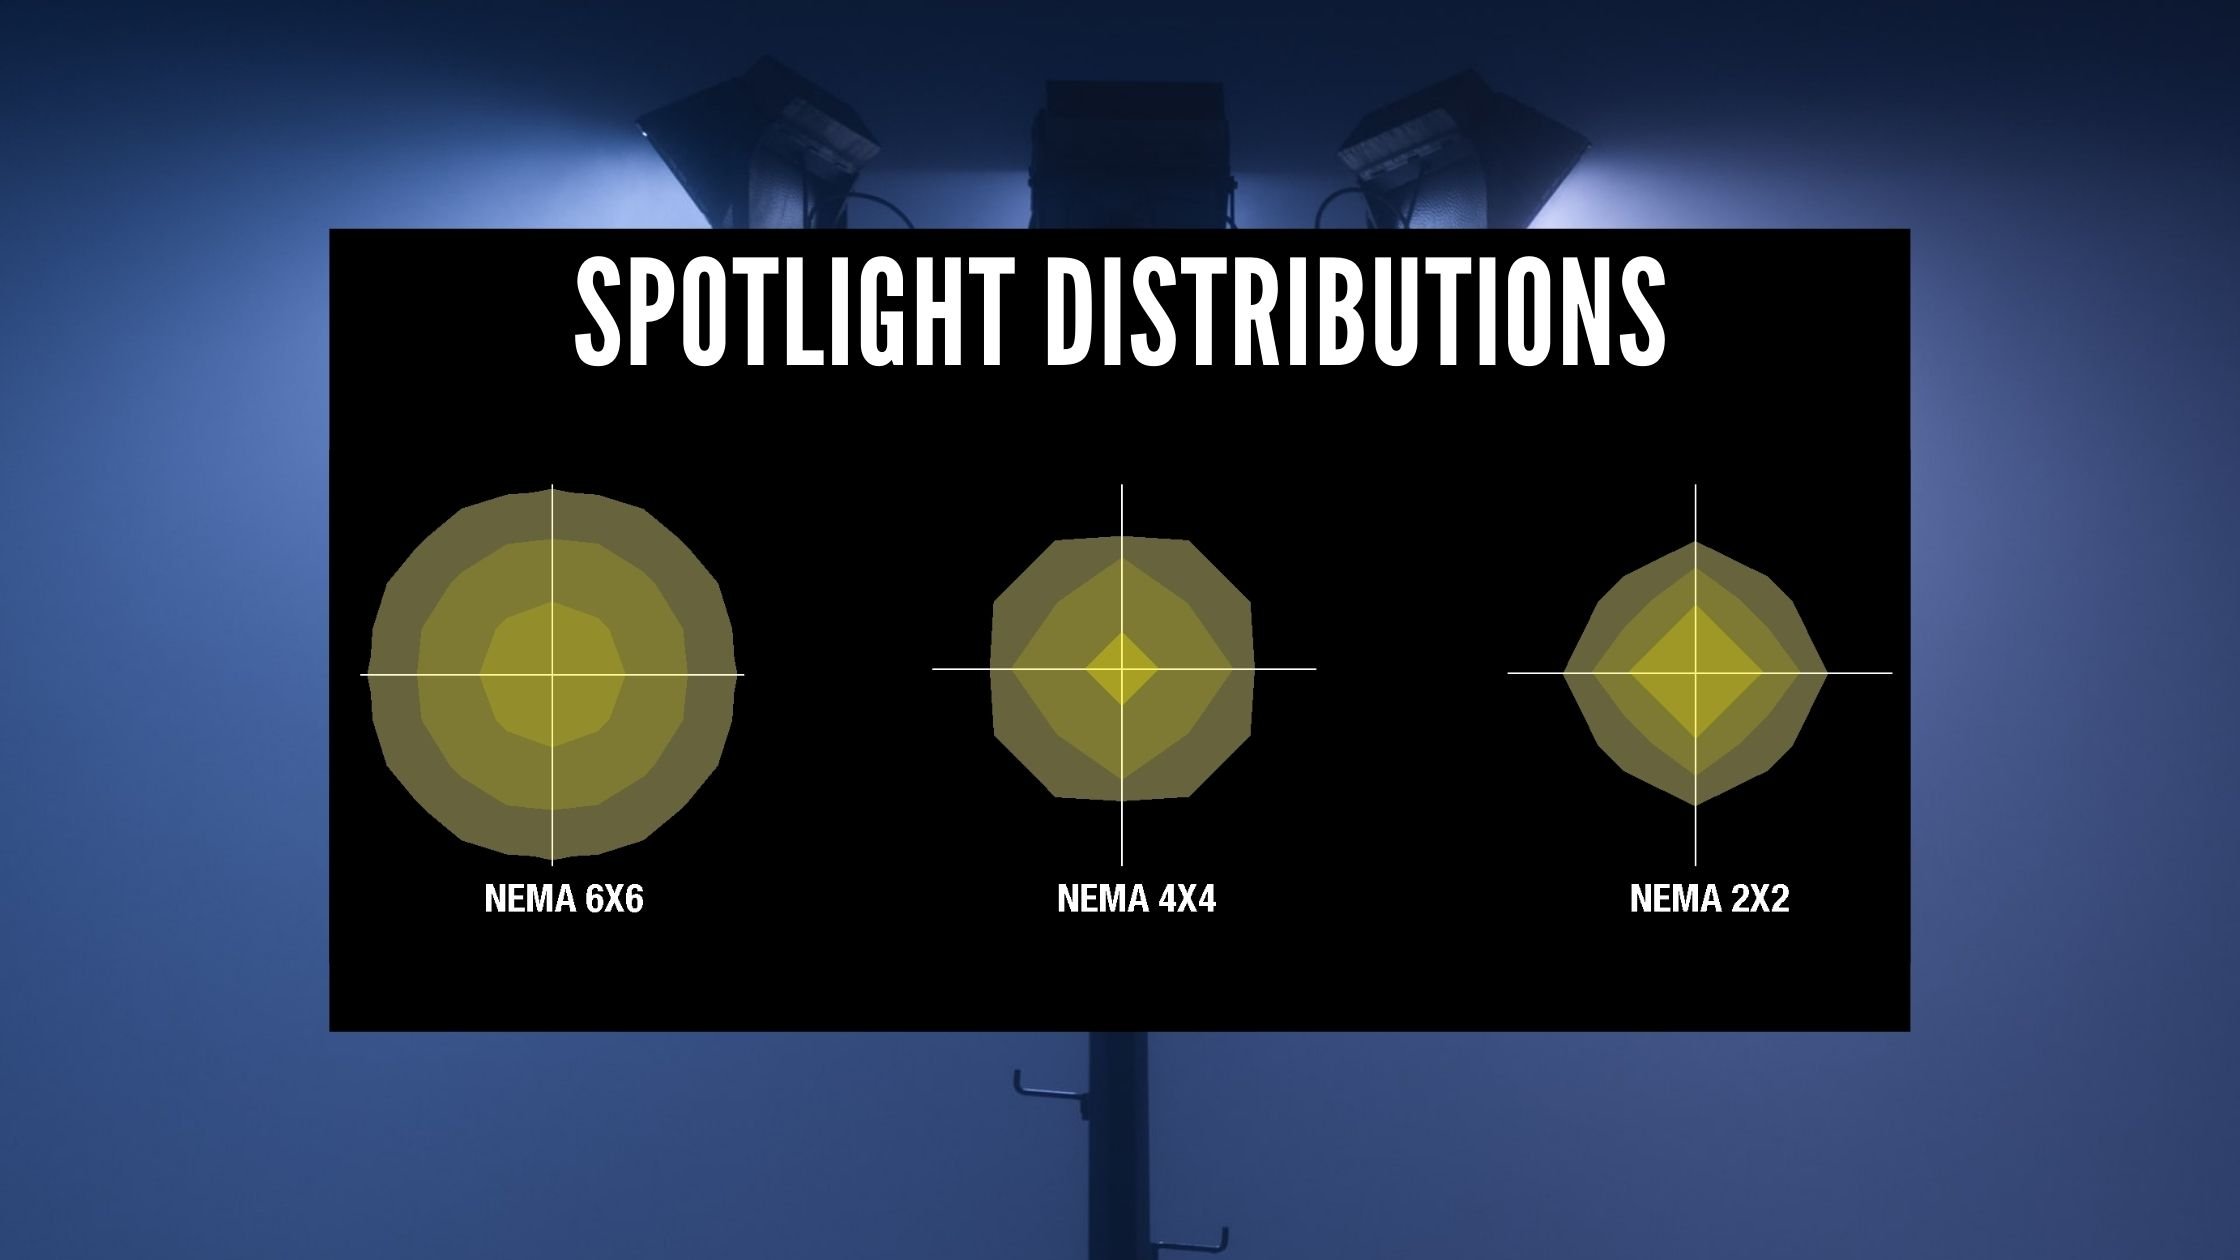
Spotlights are used for other applications, such as signs, billboards, flags, landscapes, etc. These have a different set of optics that are much different from standard overhead optics. These use NEMA 2X2, 4X4, and 6X6, with more variations available depending on the fixtures you choose. Let’s go over these three.
NEMA2X2
NEMA 2X2 optics are for very narrow spotlights. These are great for applications where you have to shine at something from a long distance as the light is pushed further than that of other spotlights. NEMA 2X2 is also good when you need a lot of light in a small space.
NEMA 4X4
NEMA 4X4 is a middle-range optic for spotlights and is good for smaller signs, flags, and landscape lighting projects. It has a larger spread than the previous light; however, it doesn’t push the light quite as far and has a more even spread when put on a surface. This optic still produces much light in a small space.
NEMA 6X6
NEMA 6X6 is the largest spread optic for our standard spotlights. This is most commonly used and has an extensive spread compared to the other optics. This can cover larger projects like billboards and signs but is also popular with security lighting projects.
Understanding the various optics and how they can work for each project will allow you to know your lighting and what would work best for your application. In many cases, the original light distribution discussed may not be the correct choice, like with floodlights vs. overhead lights.
Since overhead lights provide a much larger pattern of light than floodlights, the overheads will provide more illumination in many cases. However, on the flip side, floodlights may be the better choice. It all depends on the project, layout, and lighting requirements.
Light Trespass
When designing a lighting solution, light trespass needs to be considered, especially when located near a neighborhood. Light pollution is another factor that should be looked at when in the design phase of a lighting project. There are a few ways to prevent light trespass while not losing illumination on your project specifically.
Directional LEDs
Directional LED fixtures provide task-specific lighting and allow lighting to be customized only to illuminate necessary areas while ensuring light trespass isn’t a problem. Direction LEDs allow for different distribution patterns. Various patterns, such as a Type 2 distribution, work well for long linear applications such as roadways, whereas a Type 4 distribution has a larger forward throw to cover a square area out in front of the fixture and works for applications such as parking lots and large areas.
BUG Ratings

Backlight, uplight, and glare, also known as a BUG rating, calculate the amount of light trespassing behind and above the fixture and the amount of glare a fixture has. The lower the number, the less likely the fixture will have issues with light trespassing.
Backlight is the light that gets pushed behind the fixture/pole. New technology has allowed fixtures to have less and less backlight trespass, keeping the light in front of the fixture. Some fixtures have backlight control options. Shields are also available on some fixtures to ensure no light goes behind the fixture.
Uplight is the light that is cast into the sky above the fixture. Dark sky requirements are becoming more prevalent in lighting applications, and ensuring there is zero Uplight is key to meeting this requirement.
Glare is a problem for drivers and needs to be considered, especially in roadway applications. Clear visibility is essential for the safe navigation of vehicles. Glare can result from poorly designed lighting fixtures or improper placement, causing distractions or temporary blindness to drivers and increasing the risk of accidents. Fixtures with anti-glare technology can minimize this problem and enhance overall safety, ensuring that drivers have unobstructed and comfortable visibility at all times.
Lighting Plans
Light plans show the foot candles on the ground with any lighting application. The foot-candle is the amount of light at the surface level from a light mounted shining onto a surface. The lighting plan also shows the area of coverage and can show where light trespass can become an issue, allowing you to either change optics or move light fixtures around before installation.
Shielding
The last way to ensure there is no light trespass is to install a light fixture shield. The shield is a piece of metal installed on the fixture by the LED board that cuts off the light from shining in specific directions and is the last resort in many applications. Shields were more popular before the use of directional LED fixtures since directing the light was a bit more difficult. Shielding is not used often in LED fixture applications because of the ability to direct the light with optics.
All the above are why lighting plans are important when designing a lighting project. Picking arbitrary wattages is not a good practice today, and more in-depth research needs to be done on any project, especially when illuminating areas near residential areas.

